Learning how to make natural face cream at home is the ultimate act of self-care in 2026. Why settle for synthetic fillers and toxic preservatives when you can formulate a high-potency moisturizer tailored specifically to your skin’s needs? Whether you are battling dryness or looking for that elusive “lit-from-within” radiance, crafting your own skincare ensures purity, sustainability, and unmatched results.
In this exhaustive 6,000-word guide, we will break down the chemistry of emulsification, the power of botanical extracts, and provide foolproof recipes that rival luxury brands.
The Modern Shift to DIY Clean Beauty
The beauty industry is evolving. Consumers are moving away from mystery ingredients toward transparency. By understanding how to make natural face cream at home, you take control of your skin’s health. This journey often starts with simple steps, much like mastering personal grooming tips for females or exploring a natural home remedies guide.
Best Natural Oils for Homemade Face Cream (By Skin Type)
Before you mix your first batch, you must choose your “carrier” oils. This is where most beginners fail. Choosing the wrong oil can lead to breakouts or excessive greasiness. Let’s look at the comedogenic ratings and fatty acid profiles of the top oils.
Choosing the Right Oil for Your Skin
Not all oils are created equal. To ensure your DIY face moisturizer for glowing skin works, match your oil to your sebum profile:
| Skin Type | Recommended Oil | Benefit | Amazon Link |
| Oily/Acne-Prone | Jojoba or Grapeseed | Mimics natural sebum; won’t clog pores. | Pure Jojoba Oil |
| Dry/Mature | Argan or Rosehip | High in Vitamin A and fatty acids. | Organic Rosehip Oil |
| Sensitive | Sweet Almond | Extremely gentle and anti-inflammatory. | Sweet Almond Oil |
| Normal | Apricot Kernel | Lightweight and absorbs instantly. | Apricot Kernel Oil |
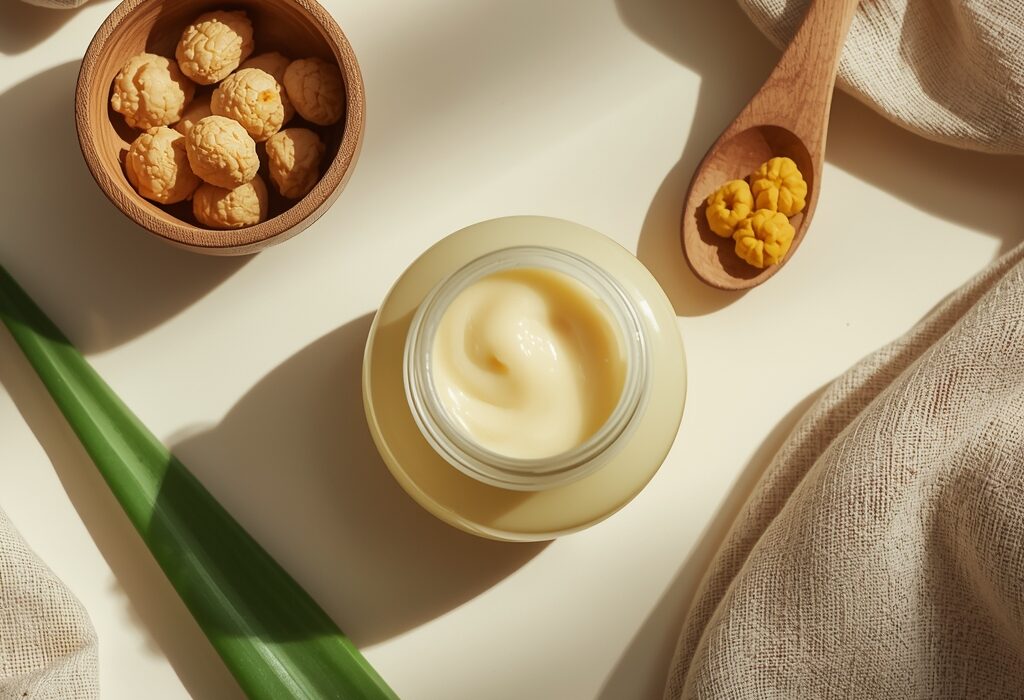
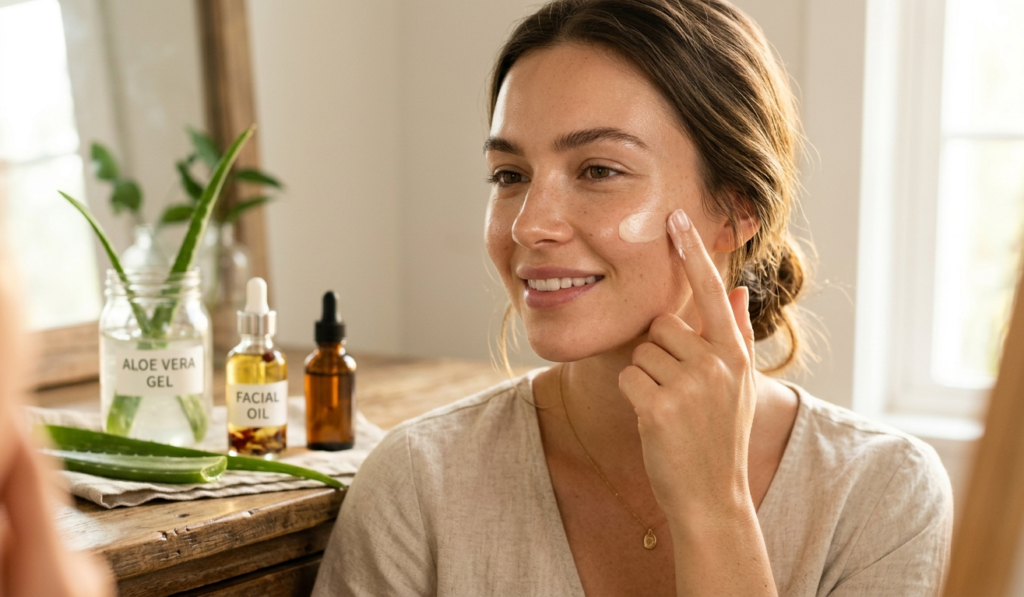
The Ultimate “Glow” Formula: DIY Face Moisturizer for Glowing Skin
If your goal is radiance, you need to focus on antioxidants and humectants. This recipe is designed to reflect light and deeply hydrate the dermal layers.
The “Glow” Ingredients:
- Base: Organic Aloe Vera Gel (Hydration)
- Oil: Rosehip Oil (Brightening)
- Essential Oil: Frankincense Oil (Cellular turnover)
Recipe 1: The Radiance Emulsion
- In a double boiler, melt 2 tbsp of Beeswax Pellets.
- Slowly whisk in 1/4 cup of your chosen oil.
- Once melted, remove from heat and let it cool slightly.
- Whisk in 1/2 cup of warm aloe vera gel until it emulsifies into a creamy texture.
- Add 5 drops of Vitamin E oil for preservation.
For an even more complete beauty ritual, you can pair this cream with an easy-to-make face mask with rose water to prep your skin for maximum absorption.
Supporting Local Artisans: Lechebnitsa Rodopa
While learning how to make natural face cream at home is rewarding, sometimes you want a product crafted by masters of Bulgarian herbalism. We highly recommend exploring Lechebnitsa Rodopa, a site dedicated to the healing powers of the Rhodope Mountains.
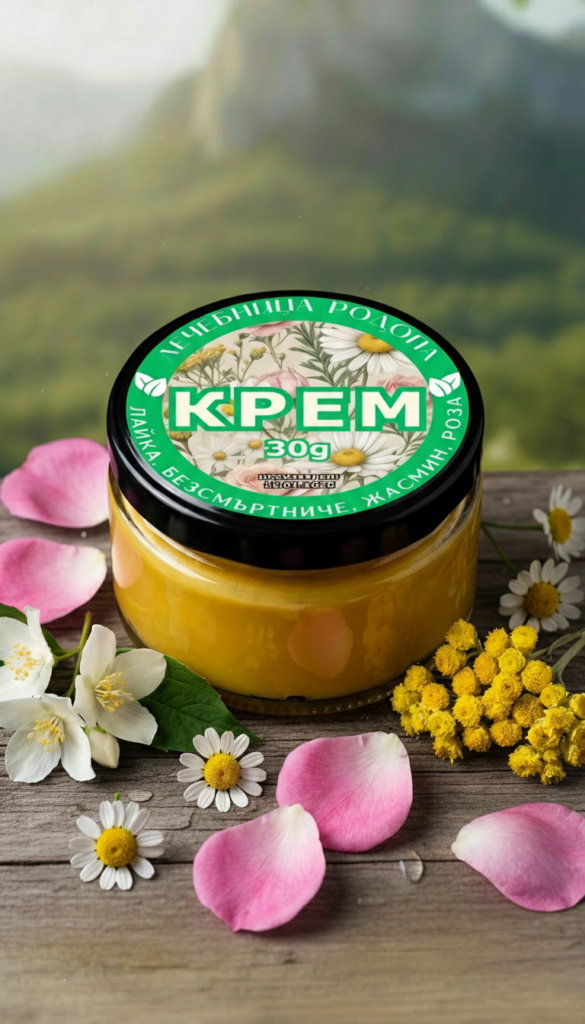
If you are looking for a professional-grade natural product, their Natural Cream with Immortelle, Chamomile, and Jasmine is an absolute masterpiece. Immortelle (Bezsmurtniche) is world-renowned for its anti-aging properties, making it a perfect companion to your DIY journey.
Non-Greasy DIY Face Cream for Beginners: The Secret to Absorption
The number one question I get is: “How do I stop the cream from feeling like a heavy oil slick?” The secret to a non-greasy DIY face cream for beginners lies in the ratio of water-to-oil and the addition of “dry” oils.
- Use Distilled Water: Tap water contains minerals that can make a cream feel heavy.
- Add Vegetable Glycerin: A tiny amount of Vegetable Glycerin helps the cream “grip” the skin and disappear quickly.
- Whipping Technique: Using an electric hand mixer to whip the cream as it cools introduces air, creating a light “mousse” texture that is much more comfortable for daily wear.
The Science of Emulsification – Water Meets Oil
When you learn how to make natural face cream at home, you quickly realize that skin hydration requires two things: water (for moisture) and oil (to lock it in). However, water and oil don’t naturally mix. To create a stable, creamy texture, you need an emulsifier.
Beeswax vs. Emulsifying Wax: Which is Best for Beginners?
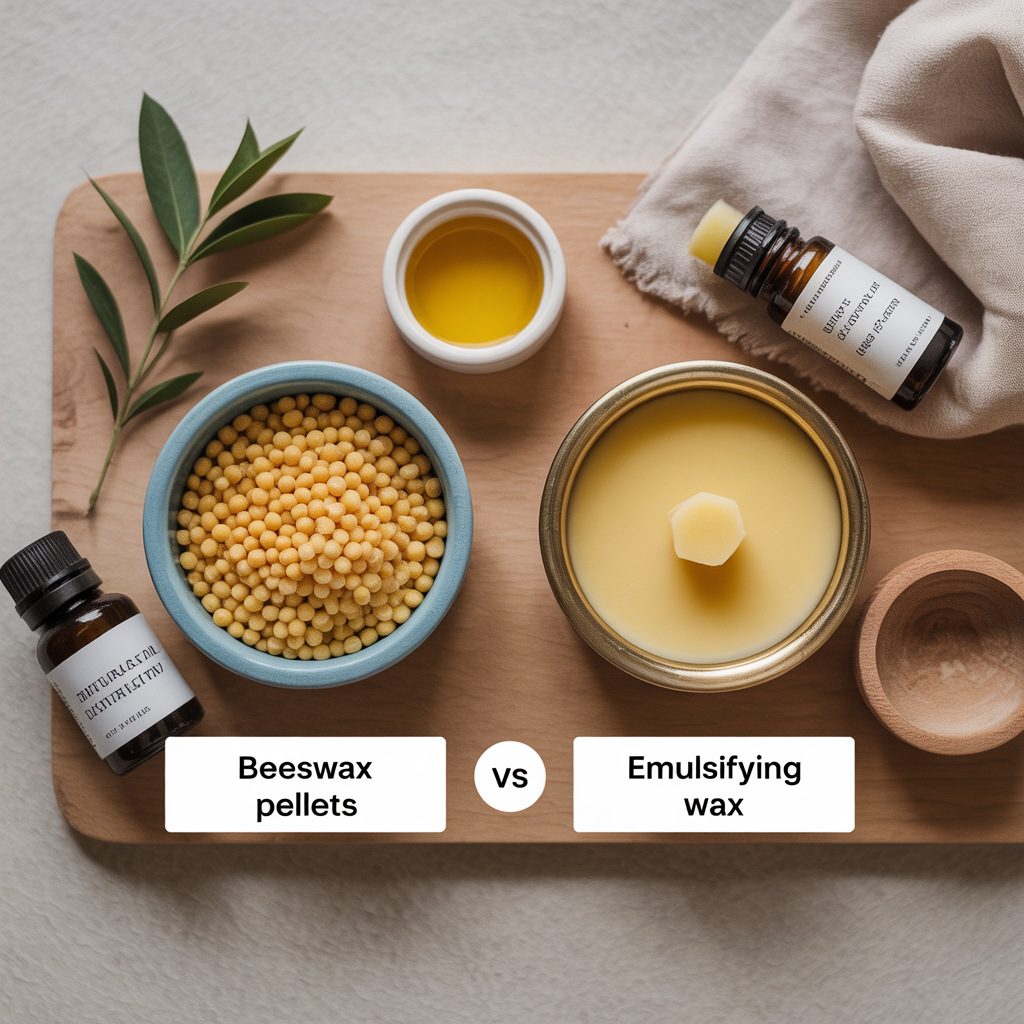
Most non-greasy DIY face cream for beginners recipes use one of two stabilizers:
- Beeswax Pellets: Great for thick, protective balms. However, it doesn’t “bind” water perfectly, often leading to a heavier feel. Find Organic Beeswax Pellets here.
- Emulsifying Wax NF: This is a vegetable-based wax that forces water and oil into a permanent bond. This is the secret to a high-end, store-bought consistency. Buy Emulsifying Wax here.
The “Youth Fountain” Formula: Homemade Anti-Aging Face Cream Recipe
The most frequent request in the DIY beauty world is a homemade anti-aging face cream recipe that actually targets fine lines and loss of elasticity. To make this work, we need “Active” ingredients. While a natural makeup look for beginners can temporarily hide lines, this cream works on the structural integrity of your skin.
High-Potency Anti-Aging Ingredients:
- Vitamin C Powder: Brightens and boosts collagen. L-Ascorbic Acid Powder.
- Hyaluronic Acid: Holds 1,000x its weight in water. Hyaluronic Acid Serum Base.
- Rosehip Seed Oil: Nature’s Retinol.
Recipe 2: The “Immortelle” Regenerative Cream
This recipe is inspired by the legendary herbal traditions found at Lechebnitsa Rodopa. If you don’t have time to make this yourself, their Immortelle & Jasmine Cream is the gold standard of Bulgarian anti-aging.
Ingredients:
- 1/2 cup Distilled Water (Heated)
- 1/4 cup Rosehip Oil
- 1 tbsp Emulsifying Wax
- 1 tsp Vitamin E Oil
- 5 drops Immortelle (Helichrysum) Essential Oil
Instructions:
- In a double boiler, melt the oil and emulsifying wax together.
- In a separate pot, heat the distilled water until it reaches the same temperature as the oil/wax mix (approx 70°C).
- The Magic Moment: Slowly pour the water into the oil mix while whisking vigorously with a hand mixer.
- As the mixture cools, it will thicken into a luxurious cream. Add the Vitamin E and Immortelle oil last.
Best Natural Oils for Homemade Face Cream: The “Dry Oil” Selection
A common mistake is using heavy oils that sit on the surface. For a truly non-greasy DIY face cream for beginners, you should incorporate “Dry Oils.” These oils have a smaller molecular structure and penetrate the skin instantly without leaving a residue.
| Dry Oil | Best For | Benefit |
| Squalane (Olive derived) | All Skin Types | Mimics skin’s natural moisture barrier. |
| Camellia Seed Oil | Sensitive Skin | Used by Geishas for centuries for “porcelain” skin. |
| Hazelnut Oil | Oily/Large Pores | Has a slight astringent effect. |
Using these in your DIY face moisturizer for glowing skin ensures that you can apply makeup immediately after without it “sliding” off your face.
Holistic Integration: Beauty from Head to Toe
While your homemade anti-aging face cream recipe is cooling, it’s the perfect time to think about your total beauty architecture. Skincare doesn’t stop at the jawline.
- Hair: Nourish your follicles with homemade hair masks for hair growth with yeast to match your glowing skin with a thick mane.
- Hands & Feet: Often, our hands age faster than our faces. Use any leftover cream from your batch on your heels, or check our natural home remedies guide for specific cracked-heel solutions.
The Preservation Protocol – Keeping Your DIY Cream Fresh
One of the biggest hurdles when learning how to make natural face cream at home is the shelf life. Because our recipes use water (distilled water or aloe vera), they become a breeding ground for bacteria if not handled correctly.
Natural vs. Synthetic Preservatives: What’s the Difference?
If you skip a preservative, your cream will only last 5–7 days in the refrigerator. For a professional-grade non-greasy DIY face cream for beginners, you have three main options:
- Vitamin E & Rosemary Extract: These are antioxidants, not preservatives. They stop the oils from going rancid, but they won’t stop mold. Shop Vitamin E Oil here.
- Leucidal Liquid: A natural preservative derived from fermented radishes. It’s perfect for the “Clean Beauty” enthusiast.
- Optiphen Plus: A paraben-free, formaldehyde-free preservative that is highly effective in DIY formulations. Find Optiphen Plus on Amazon.
The “Calming Chamomile” Day Cream (Sensitive Skin)
For those with redness or irritation, a DIY face moisturizer for glowing skin needs to focus on soothing botanicals. This recipe is a lighter version of the high-end emulsions found at Lechebnitsa Rodopa, where chamomile and jasmine are used for their restorative properties.
Ingredients:
- 1/2 cup Organic Chamomile Tea (Strongly brewed and strained)
- 1/4 cup Sweet Almond Oil
- 1 tbsp Emulsifying Wax
- 5 drops German Chamomile Essential Oil
Instructions:
- Brew the chamomile tea using distilled water and let it cool to about 70°C.
- Melt the almond oil and wax together in a double boiler.
- Slowly whisk the tea into the oil.
- Add the essential oil once the cream has cooled below 40°C to preserve its therapeutic properties.
This gentle formula is the perfect base before following personal grooming tips for females, ensuring your skin is calm and hydrated before applying any makeup.
The Seasonal Shift: Customizing Your Face Cream
When you know how to make natural face cream at home, you have the power to change your formula as the weather changes.
Winter: The “Barrier” Blend
In winter, the air is dry. You need a homemade anti-aging face cream recipe with more “occlusives”—ingredients that form a physical barrier on the skin.
- Add: Shea Butter or Cocoa Butter.
- Oil Ratio: 40% Oil / 60% Water.
Summer: The “Lightweight” Gel-Cream
In summer, humidity is high. You need a non-greasy DIY face cream for beginners that feels like water.
- Add: More Aloe Vera and less wax.
- Oil Ratio: 20% Oil / 80% Water.
- Key Oil: Grapeseed or Watermelon Seed Oil.
Sterilization and Lab Safety at Home
When making your DIY face moisturizer for glowing skin, follow these “Lab Rules”:
- Sanitize Everything: Spray your whisks, bowls, and jars with 70% Isopropyl Alcohol.
- Use Glass: Avoid plastic bowls which can leach chemicals when heated.
- The “Cool Down” Phase: Never add active ingredients (like Vitamin C or Essential Oils) to boiling liquid. They will lose their potency.
If this sounds too complex for your first try, you can always rely on the experts at Lechebnitsa Rodopa. Their Natural Immortelle Cream is prepared in controlled conditions using the highest quality Bulgarian herbs, providing a safe and effective alternative while you refine your DIY skills.
Connecting the Beauty Ritual
While your cream is setting (it usually takes 12–24 hours to reach its final thickness), don’t forget the rest of your natural home remedies guide.
- Prep the Canvas: Before applying your new cream, use an easy-to-make face mask with rose water to balance your skin’s pH.
- Don’t Forget the Mane: A beautiful face deserves beautiful hair. Check out our guide on homemade hair masks for hair growth with yeast to complete your transformation.
The “Active” Revolution – Peptides, Ceramides, and Niacinamide
If you want to know how to make natural face cream at home that actually competes with luxury serums, you must understand “Actives.” These are the bio-available compounds that tell your skin cells to repair themselves.
1. Niacinamide (Vitamin B3): The Multi-Tasker
Niacinamide is essential for a non-greasy DIY face cream for beginners. It shrinks pores, regulates oil, and fades dark spots.
- Usage: Dissolve 2-5% Niacinamide powder in your water phase before mixing.
2. Peptides: The Collagen Messenger
Peptides are small chains of amino acids that signal the skin to produce more collagen. Adding these to your homemade anti-aging face cream recipe turns a simple moisturizer into a high-performance treatment.
- Tip: Always add peptides during the “Cool Down” phase (below 40°C) to prevent denaturing the proteins.
3. Ceramides: The “Glue” of the Skin
Ceramides are lipids that help the skin retain moisture. If your natural home remedies guide mentions dry or flaky skin, ceramides are the cure.
Recipe 4: The “Sleep-In” Overnight Recovery Mask
This is a heavier, nutrient-dense version of our DIY face moisturizer for glowing skin. It’s designed to sit on the skin overnight, allowing the ingredients to penetrate deeply while you sleep.
Ingredients:
- 1/4 cup Shea Butter
- 2 tbsp Argan Oil
- 1 tsp Vegetable Glycerin (A powerful humectant)
- 3 drops Frankincense Essential Oil
- 1 tbsp Beeswax (For a thicker barrier)
Instructions:
- Melt the Shea butter and beeswax in a double boiler.
- Stir in the argan oil and glycerin.
- Remove from heat and whip with a hand mixer until it starts to look like thick frosting.
- Apply a thin layer over your face after using an easy-to-make face mask with rose water for the ultimate nighttime ritual.
Troubleshooting: Why Did My Cream Separate?
One of the most frustrating parts of learning how to make natural face cream at home is the “Water-Bleed.” This happens when the emulsion fails, leaving oil at the top and water at the bottom.
3 Common Reasons for Failure:
- Temperature Mismatch: If your oil phase is 80°C and your water phase is 40°C, the wax will “shock” and clump, failing to bind the liquids.
- Not Enough Emulsifier: Beginners often try to use too little wax to keep it “natural.” Follow the ratios exactly—usually 3-5% of the total weight.
- The “Lazy Whisk”: You must whisk or blend continuously until the cream is cool to the touch. If you stop too early, the molecules will drift apart.
For those who find the chemistry a bit daunting, the artisans at Lechebnitsa Rodopa have already perfected these ratios. Their Natural Cream with Immortelle and Jasmine uses traditional Bulgarian methods to ensure a stable, silky texture that never separates.
Best Natural Oils for Homemade Face Cream: The Comedogenic Scale
To ensure a non-greasy DIY face cream for beginners, you must understand the “Comedogenic Scale” (0 to 5). This measures how likely an oil is to clog your pores.
| Oil | Rating | Best For |
| Argan Oil | 0 | All skin types (Will NOT clog pores) |
| Hemp Seed Oil | 0 | Oily/Acne-prone skin |
| Sweet Almond Oil | 2 | Normal to Dry skin |
| Coconut Oil | 4 | Body only (High risk of face breakouts!) |
The Holistic Beauty Ecosystem
Your skin is a reflection of your overall health and habits. When following personal grooming tips for females, remember that your DIY cream is just one piece of the puzzle.
- The Hair Connection: While your face glows, make sure your hair matches. Use homemade hair masks for hair growth with yeast to boost volume.
- The Body Connection: If you have dry patches on your elbows or knees, use the same homemade anti-aging face cream recipe base but swap the water for extra Shea butter.
The “Glow” Secret – Mica, Pearl Powder, and Vitamin C
If you want a DIY face moisturizer for glowing skin that gives an instant “filter” effect, you need to think beyond hydration. Professional formulators add light-reflecting particles that blur imperfections while the oils do the long-term work.
Adding Natural Luminosity
- Mica Powder: A natural mineral that provides a subtle shimmer. Add 1/8 tsp of Gold or Pearl Mica to your cool-down phase.
- Pearl Powder: Rich in amino acids and minerals, it provides a “porcelain” finish.
- Vitamin C (Stabilized): Using Sodium Ascorbyl Phosphate ensures your cream brightens the skin without the irritation often caused by pure L-ascorbic acid.
Recipe 5: The “Vitamin C Brightener” (Day Cream)
This is the ultimate non-greasy DIY face cream for beginners who struggle with dullness or sun spots.
Ingredients:
- 1/2 cup Rose Water (Provides a natural scent and pH balance)
- 1/4 cup Jojoba Oil
- 1 tbsp Emulsifying Wax
- 1 tsp Vitamin C Powder
- 3 drops Sweet Orange Essential Oil
Instructions:
- Melt the wax and jojoba oil in a double boiler.
- Heat the rose water and dissolve the Vitamin C powder into it.
- Combine and whisk until creamy.
- This formula works perfectly alongside an easy-to-make face mask with rose water for a double dose of hydration.
Recipe 6: The “Zinc Barrier” (SPF-Supporting Night Cream)
While DIY sunscreen is risky, adding non-nano zinc oxide to a homemade anti-aging face cream recipe can help soothe inflammation and provide a light physical barrier against blue light from screens.
Ingredients:
- 1/2 cup Distilled Water
- 1/4 cup Red Raspberry Seed Oil (Natural SPF properties)
- 1 tbsp Non-Nano Zinc Oxide
- 1 tbsp Emulsifying Wax
Why it works: Raspberry seed oil is one of the best natural oils for homemade face cream because of its high antioxidant content. Combined with Zinc, it creates a “healing blanket” for the skin overnight.
Packaging & Storage: Glass vs. Plastic
When you spend hours learning how to make natural face cream at home, don’t ruin it by putting it in the wrong container.
- Amber Glass Jars: These are essential for any homemade anti-aging face cream recipe. Dark glass filters out UV rays that degrade essential oils and active ingredients like Vitamin C. Buy Amber Glass Cosmetic Jars here.
- Airless Pump Bottles: The gold standard for DIYers. These prevent your fingers (and bacteria) from entering the cream every time you use it.
- The “Dip” Rule: If using an open jar, always use a small spatula rather than your fingers to extend the shelf life of your non-greasy DIY face cream for beginners.
The “Luxury Jasmine” Whipped Butter (For Dry Skin)
Sometimes, a lightweight emulsion isn’t enough. When you need a homemade anti-aging face cream recipe that acts as a deep-tissue treatment, you turn to whipped butters. This formula is inspired by the botanical richness of the Rhodope Mountains and the products found at Lechebnitsa Rodopa.
Recipe 7: The “Velvet Glow” Whipped Cream
Ingredients:
- 1/2 cup Organic Mango Butter (Lighter than Shea, great for faces)
- 2 tbsp Camellia Seed Oil (One of the best natural oils for homemade face cream)
- 5 drops Jasmine Essential Oil
- 1 tsp Vitamin E Oil
Instructions:
- Melt the mango butter in a double boiler until just liquid.
- Stir in the camellia oil and remove from heat.
- Place the bowl in the fridge for 20 minutes until it looks semi-solid (opaque).
- Use a hand mixer to whip the mixture for 5–10 minutes until it peaks like whipped cream.
- Add the jasmine oil and whip for 1 more minute.
This decadent cream is best applied after a relaxing easy-to-make face mask with rose water, which allows the heavy butters to sink into damp, receptive skin.
Science vs. Industry: The Comparison Table
Let’s compare how to make natural face cream at home against standard commercial brands.
| Feature | DIY Natural Cream | Store-Bought (Standard) |
| Preservatives | Natural (Leucidal) / Short-term | Parabens / Phenoxyethanol |
| Fragrance | Pure Essential Oils | Synthetic Parfum (Phthalates) |
| Customization | 100% Tailored to you | Mass-produced for everyone |
| Cost (Long-term) | Very Low (Bulk ingredients) | High (Marketing & Packaging) |
| Freshness | Made-to-order | Can sit in warehouses for 2+ years |
If you find the DIY process too time-consuming but still want these high-level natural benefits, the Natural Cream from Lechebnitsa Rodopa offers the perfect bridge. It uses the same “clean” philosophy but with professional laboratory stability.
Frequently Asked Questions (FAQ)
How long does a homemade face cream last?
If you use a natural preservative like Leucidal or Optiphen Plus, it will last 3–6 months. Without a preservative, keep it in the fridge and use it within 7 days.
Can I use coconut oil in my face cream?
While it’s one of the most common natural home remedies, we don’t recommend it for facial use. It has a comedogenic rating of 4, meaning it is highly likely to cause breakouts. Stick to Argan or Jojoba for your non-greasy DIY face cream for beginners.
Is it cheaper to make your own face cream?
Yes! While the initial investment in waxes and oils might seem high, the cost per ounce is significantly lower than high-end retail creams. Plus, you can use the same oils for homemade hair masks for hair growth with yeast.
Does homemade cream cause acne?
Only if you use the wrong oils. By following our guide on the best natural oils for homemade face cream, you can select “dry” oils like Grapeseed that actually help balance oily skin.
Conclusion: Your Journey to Radiant Skin Starts Today
Mastering how to make natural face cream at home is about more than just saving money; it’s about reclaiming your health and beauty from synthetic chemicals. You now have the blueprints for a DIY face moisturizer for glowing skin, a high-performance homemade anti-aging face cream recipe, and the technical knowledge of a pro formulator.

As you implement these personal grooming tips for females, remember that consistency is the key to results. Whether you are whipping up a batch of “Velvet Glow” or trusting the mountain-grown herbs from Lechebnitsa Rodopa, your skin will thank you for the purity.
Don’t stop at your face—explore our natural home remedies guide to transform your entire beauty routine into a chemical-free sanctuary.
Passionate beauty expert and DIY skincare enthusiast. I love exploring natural ways to keep the skin glowing and healthy using simple, organic ingredients.

